
This guide describes how to set up SAML-based authentication for the application “LIZ Booker” in Microsoft Entra ID (formerly Azure AD).
Video: ENG_Microsoft Entra - Microsoft Entra Admin Center - SAML SSO Connection
❓ To clarify beforehand
- Is there already an Enterprise Application in Entra ID?
- Are the “Departments” maintained in the Entra profile?
If yes, they can be synchronized via claim.
🔧 Configuration in Microsoft Entra (Customer Side)
1. Create a new Enterprise Application
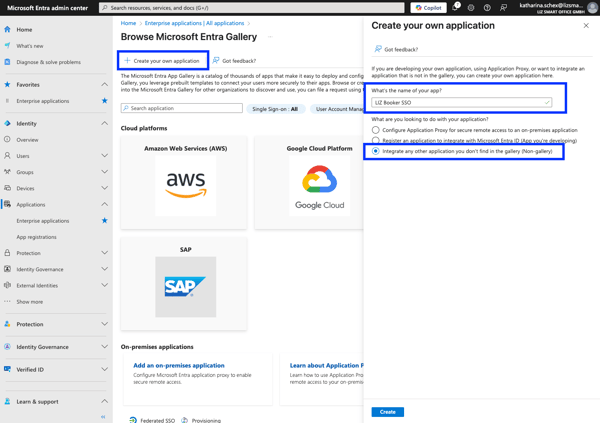
Navigation: Microsoft Entra > Enterprise Applications
- Click on + New application
- Select Create your own application
- Name: e.g., LIZ Booker
- Click Create
- Select: Integrate any other application you don't find in the gallery
2. SSO Configuration: SAML
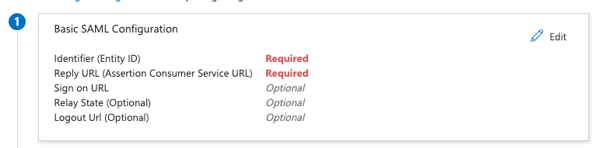
Box 1: Basic SAML Configuration
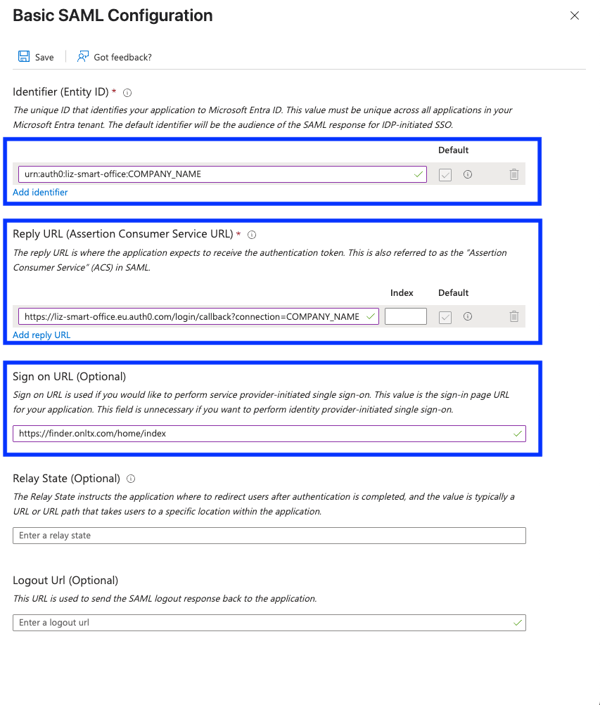
- Identifier (Entity ID): urn:auth0:liz-smart-office:COMPANY_NAME
- Reply URL: https://liz-smart-office.eu.auth0.com/login/callback?connection=COMPANY_NAME
- Sign-on URL: https://finder.onltx.com/home/index
- Save & close the box (top right)
Box 2: Attributes & Claims
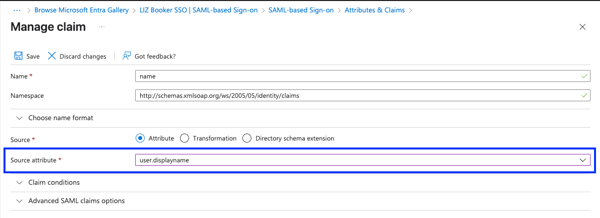
Additional Claim:
- Name:
- Source Attribute: user.displayname
- Save
Transform to Email:
- Source Attribute: user.email
- Transformation: ToLowercase()
- Attribute Name: user.email
- Add
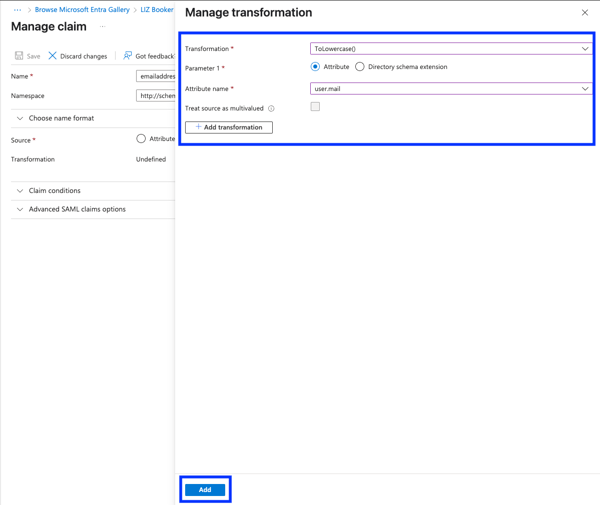
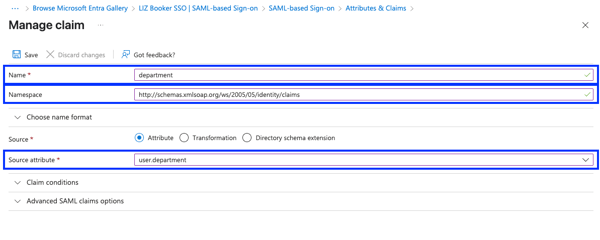
With Departments (optional):
- New Claim:
- Name: department
- Namespace: http://schemas.xmlsoap.org/ws/2005/05/identity/claims
- Source: Attribute
- Source Attribute: Select the field where the department is stored (e.g. user.department)
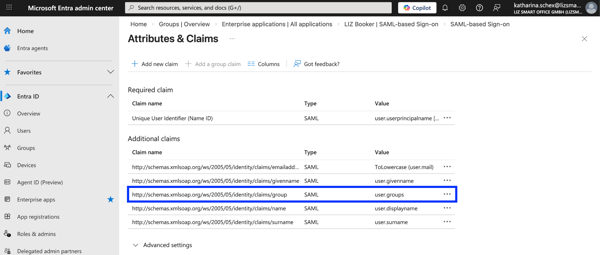
With Groups (optional):
- + New Gruppen Claim
- Name: group
- Namespace: http://schemas.xmlsoap.org/ws/2005/05/identity/claims
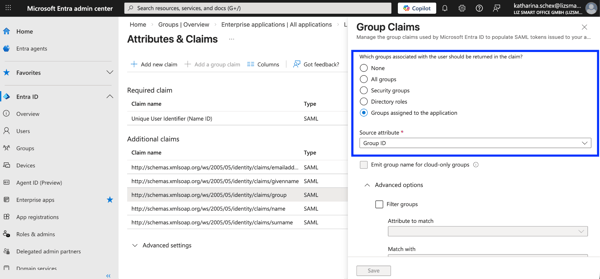
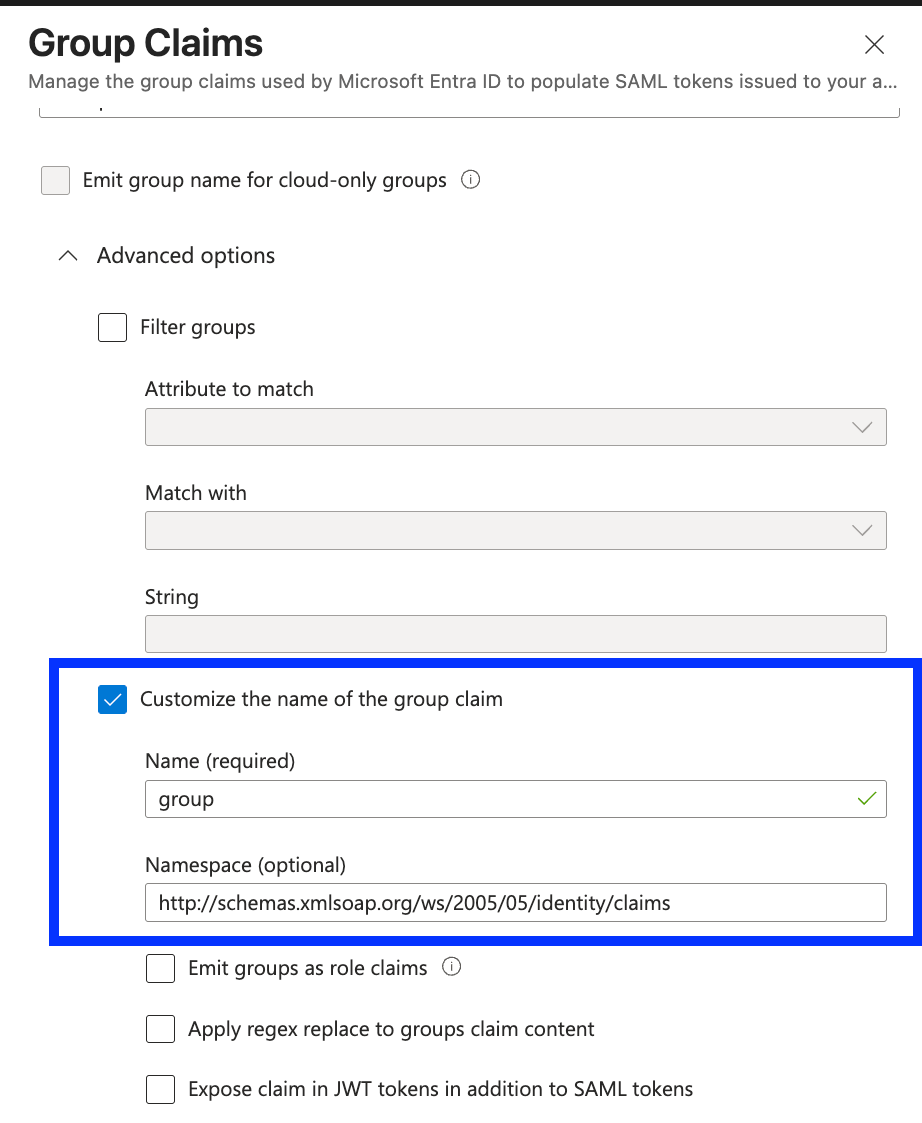
IMPORTANT: Please make sure if the group claims are set to “Groups assigned to the application”, the Groups are added to the application.
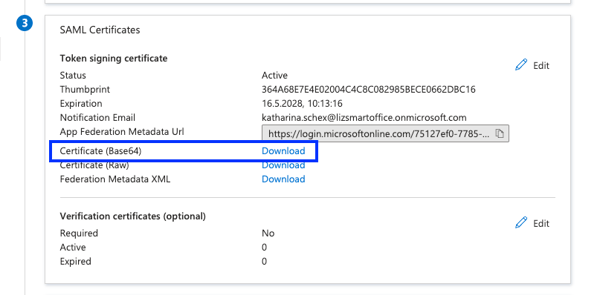
Box 3: SAML Certificates
- Certificate (Base64): Download and send to the LIZ team via email
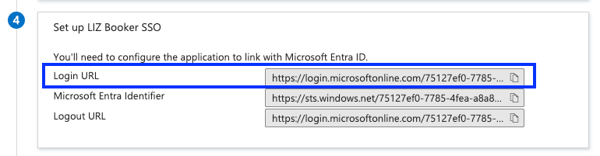
Box 4: Set-up URL
- Sign-in URL (SAML Endpoint):
E.g. https://login.microsoftonline.com/75127ef0-7785-4fea-a8a8-2b0480bfed15/saml2
→ Please share this URL (e.g., via chat)
👥 User & Group Assignment
- If only specific groups/users should have access:
- Assign them under Users & Groups in the application
- If not:
- Go to Properties > Assignment required? and set to No
- Save